Attention
For better experience with the ARA portal, use Google Chrome (or any derivatives of Chrome) or Mozilla Firefox browser.
“Hello World!” Experiment
Platform: ARA Computing Server
Resources Required: Any server with compute capabilities (see ARA Resource Specification).
Short Description: The experiment demonstrates reserving an ARA computing resource and launch a container in the reserved node.
Detailed Description: The “Hello World!” experiment in ARA is intended to provide users the first experience of the infrastructure on reserving and accessing a fundamental computing resource. ARA provisions the resources using Docker containers and provides access to the users for executing their experiments.
Detailed Steps for the Experiment
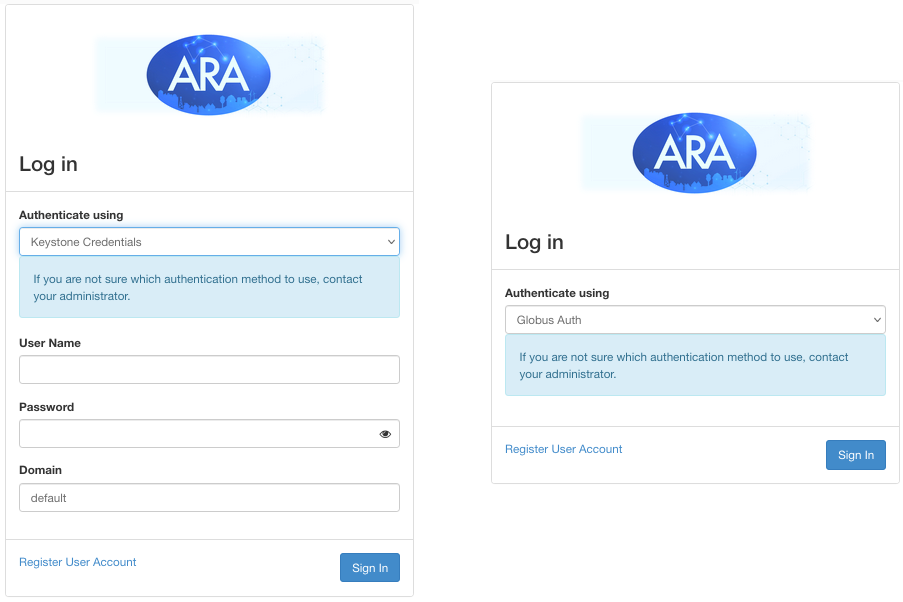
Access the login page and use the credentials to login.
To reserve an ARA compute resource, we need to create a lease for the resource. Click the Leases option under the Project -> Reservations tab in the dashboard.
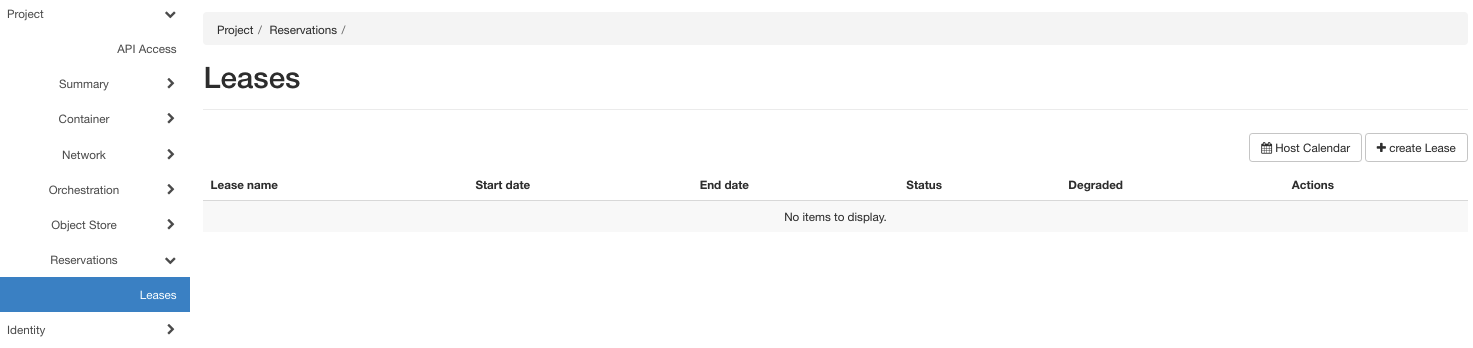
Click on the Create Lease button on the top-right. The user will be redirected to the Create Lease form for specifying the reservation specific attributes.
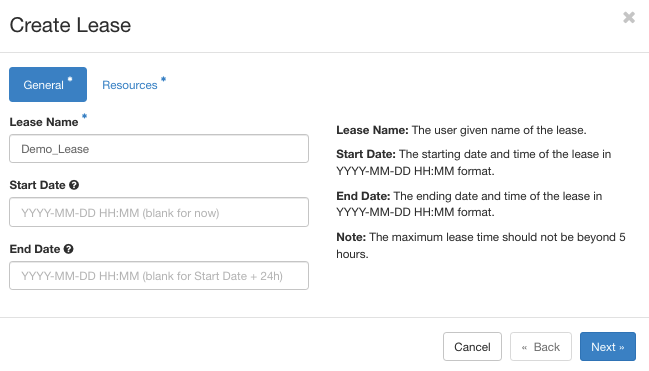
In the tab General, you need to specify the following attributes:
Lease Name: User-given name for the lease. Lease name should be unique across the entire ARA portal. That is, in case there exists another lease with the given name, ARA portal raises an error.
Start Date: The intended date (and time) of start of the lease. User can specify the timestamp in their own time zone if they set their time zone as provided here. Otherwise, follow the UTC time zone.
End Date: The intended time for ending the lease. Time zone follows the same rule as the field Start Date.
Note
The maximum lease time for any reservation is set to 5 hours. If you leave the Start Date and End Date blank, the default lease time is considered as 2 hours.
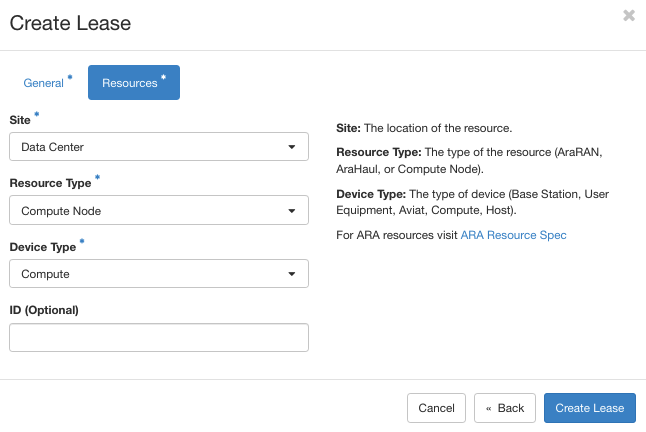
In the Resources tab, we need to select the following attributes of the resource.
Site: The site at which the resource resides. For compute node, we need to select Data Center.
Resource Type: Among the list of available resource types in the drop-down menu, select the Compute type.
Device Type: From the drop-down box, select Compute Node.
Device ID: The specific ID of the device, e.g., 000, 001, and so on. Device ID is used to reserve specific device. If the field is kept blank, any free node satisfying the Site, Resource Type, and Device Type attributes is reserved at random.
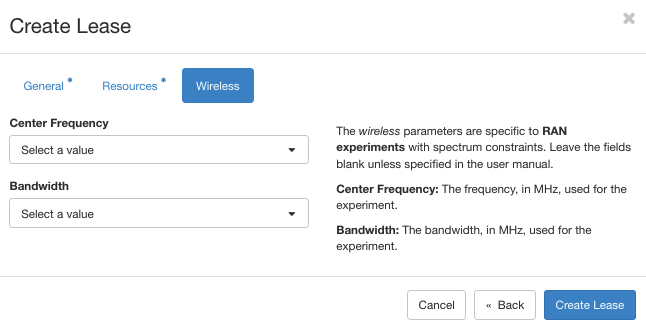
The Wireless tab is intended for RAN experiments. Information on the values will be provided specific to experiments. In fact, the Wireless tab will be active only for AraRAN experiments. For compute nodes, we can ignore the fields in this section.
After specifying the lease parameters, click the Create Lease button at the bottom right to create the lease. It may take several seconds to a few minutes to activate the lease. In case the lease is created for a future time-slot, the status will be in the PENDING state and will become active at the starting time of the lease. You may need to refresh the page to see the status becoming ACTIVE.
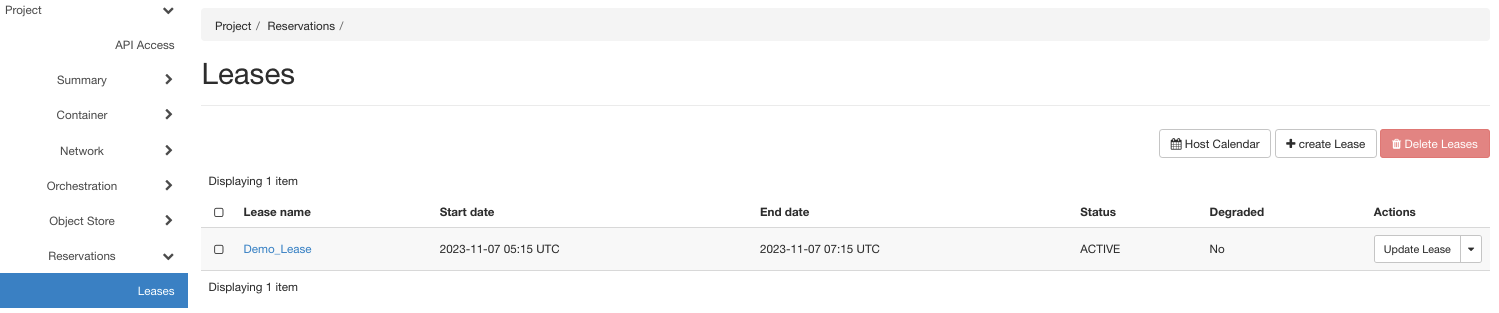
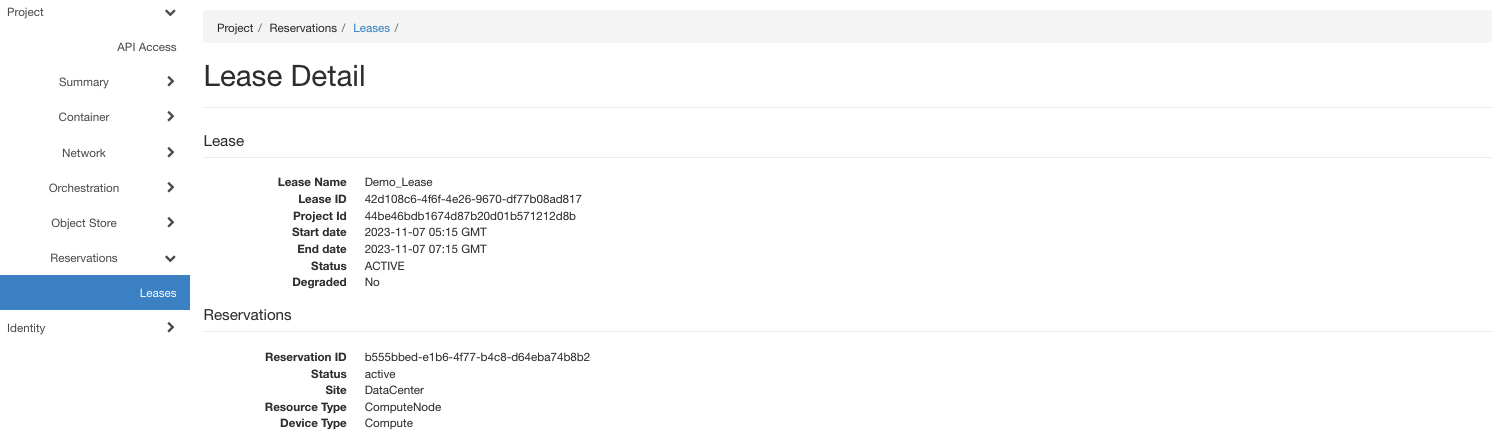
The created lease will be listed in the page and click on the created lease to see the information. A sample screenshot of a lease is shown below.
Note
Remember to make a note of the Lease Name under the Lease section since it is required during the container creation.
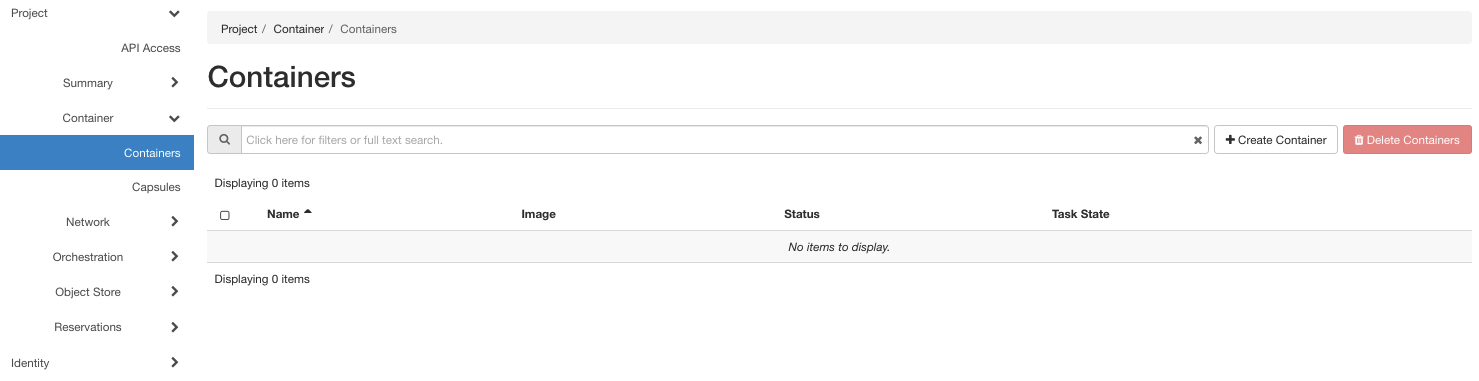
To create a container, select the Containers tab in the Project -> Container menu from the dashboard as shown in the following figure.
Click the Create Container button at the top-right of the page.
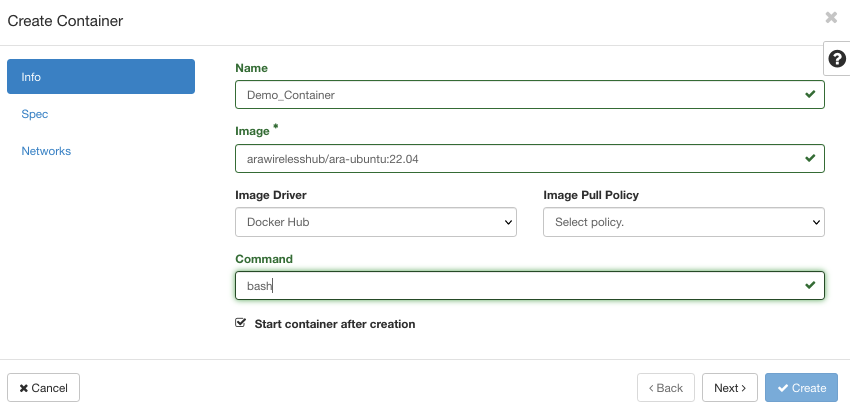
In the Info tab, provide the general details of the container. For example:
Name: Name of the container
Image: Container image, say
arawirelesshub/ara-ubuntu:22.04. Please note that ARA portal allows only containers from arawirelesshub DockerHub repository.Image Driver: Select the container image source, say Docker Hub (i.e., the image will be pulled from the Docker Hub repository).
Image Pull Policy: Specifies the events to pull the container images. It provides three options:
If not present: The container image is pulled only if the image is not present in the host.
Always: The new container image is pulled to the host irrespective of the existence of the same image in the host.
Never: The new container image is never pulled from DockerHub. However, in case there does not exist an image, the container creation will be failed.
Command: Provide the command to run when the container is launched. For example, to get a command line interface, we need to provide bash as the command.
In the Spec tab, you can provide the default values except for the Lease Name field, where you need to select the Lease Name on which the container is launched.

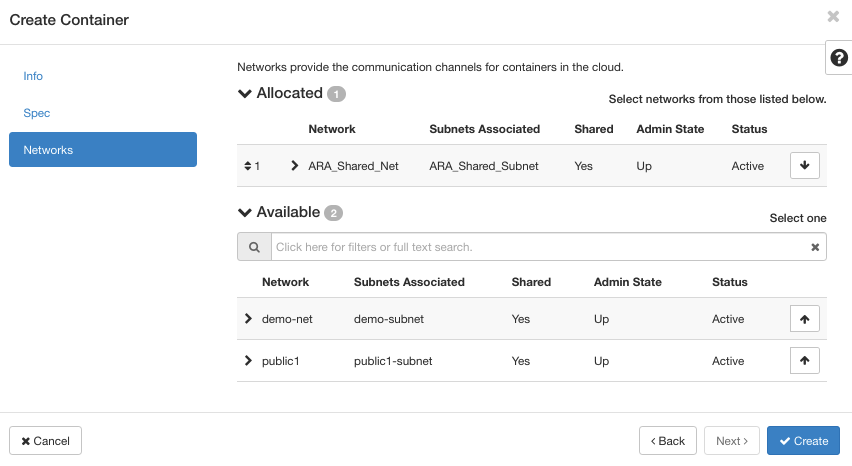
In the Networks tab, select the network, which is mandatory for any container creation. For example, you can select ARA_Shared_Subnet.
Click the Create button for creating the container. The status of created container is as follows:

Note
If you face any issue in creating the container, refer to our FAQ.
Clicking on the container shows the properties of the container such as name, host, IP address, and floating IP address.
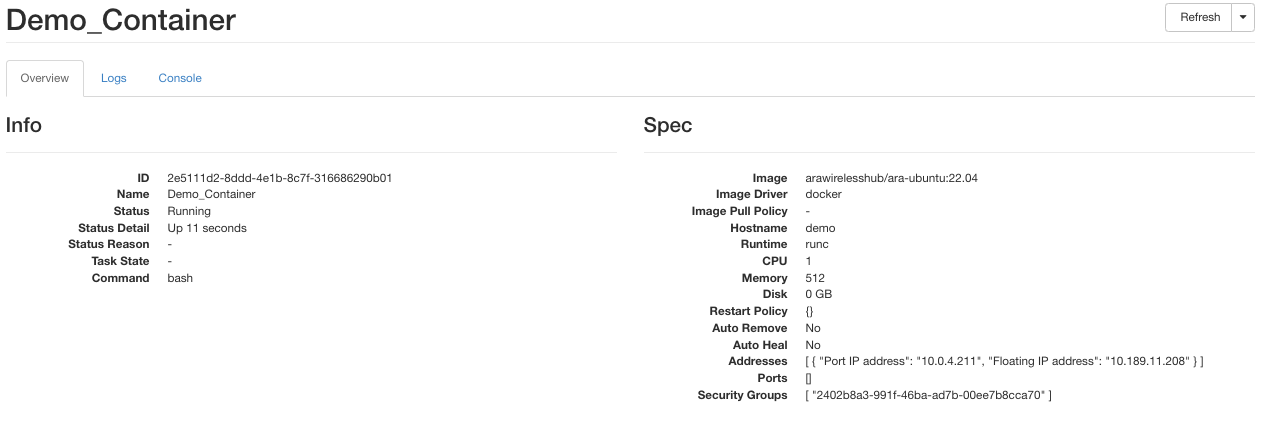
Note
Take a note on the floating IP address which is used to login to the container from the ARA jumpbox. It may take a few seconds for the floating IP to appear. If you cannot see the floating IP, just refresh the page.
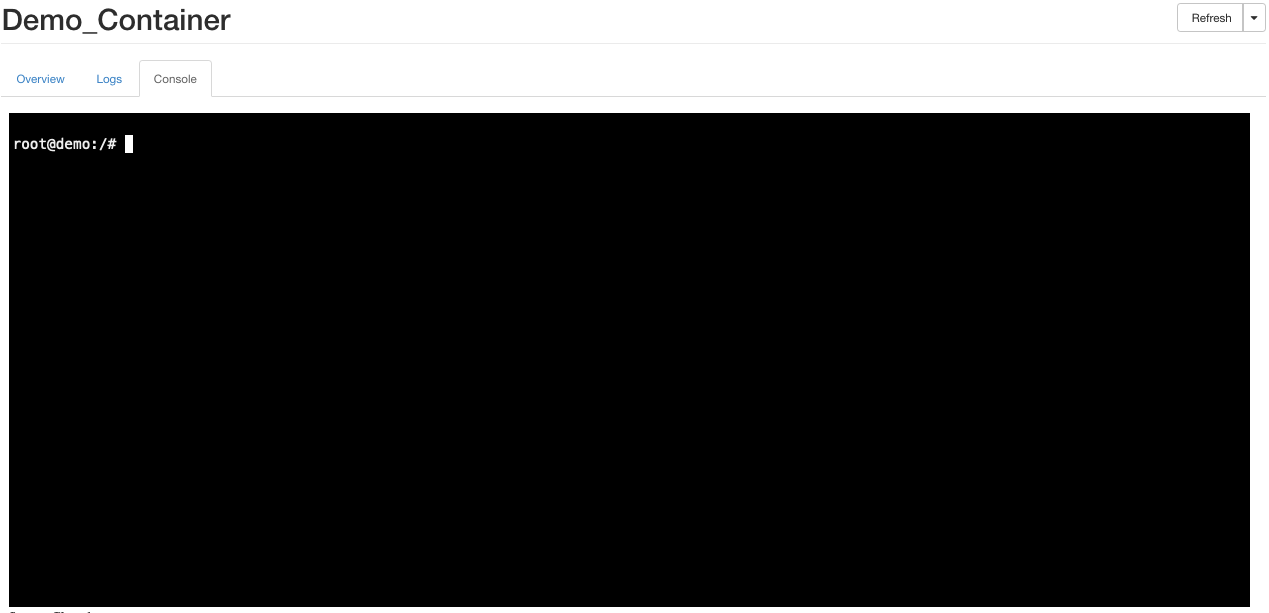
The Console tab on the top may direct you to the shell of the container where you can run the experiment. Please note that the console may not be available in some browsers due to plugin restrictions. In such cases, the container can be accessed using floating IPs.
We can use the floating IP to ssh into the container via the ARA-jumpbox, an intermediate node provided by ARA for users to access their containers. ARA-jumpbox provides 2-hop access to a container user’s machine. See ARA Jumpbox for details.
First login to the ARA Jumpbox using the username given. For example, for the jumpbox username johndoe, you can login to the jumpbox using the following command from your computer terminal.
ssh -i private_key johndoe@jbox.arawireless.orgNext login to the container with the floating IP assigned. Ensure that SSH service is running in the container as described here. For the example, you can use the following command to login to the container.
ssh root@floating_ipThe experiment related files (logs, results, etc.) can be copied to users local computer using SCP (Secure copy) command via jumpbox.