Monitoring AraMIMO Wireless Link Behavior
Platform: Skylark Wireless
Resources needed: Central Unit (CU), Distributed Unit (DU), Radio Unit (RU), and a Customer Premises Equipment (CPE)/User Equipment (UE)
Short Description: The experiment is designed to monitor wireless link parameters of the AraMIMO deployment.
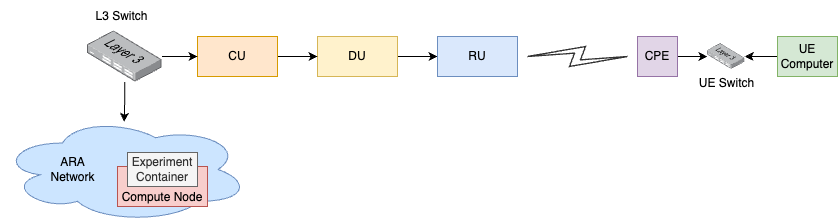
Detailed Description: AraMIMO consists of multiple CPEs connected to the Base Station (BS) which is a Skylark Wireless Faros V2 equipment. With this experiment, we can launch a container equipped with APIs to interact with Skylark CU and measure real-time link utilization and performance-related metrics on the Skylark platform. The figure below shows the detailed network and experient diagram.
Detailed Steps
Login to the portal
portal.arawireless.orgwith your username and password. Please go through the Hello World example on how to login to portal, create a lease, launch a container, assign a floating IP address and accessing the container (or make sure you have already run that experiment successfully and are familiar with using the experiment portal).Note
If you are a first time user, it is highly recommended to run the Hello World experiment first to get familiarized with the interface and portal.
Create a reservation using the Project -> Reservations -> Leases tab from the dashboard.
Click on
create Leaseand write the Lease Name e.g. skylark_mimo_1 and clickNext.Select the resource attributes. There are four BS sites available for experimentation. The following table shows the resource attributes for the four BS sites and how to reserve them:
Skylark BS Resource Reservations Table
Resource No.
Site
Resource Type
Device Type
Device ID
1
Wilson Hall
AraRAN
Skylark Base Station
000
2
Boone
AraRAN
Skylark Base Station
000
3
Gilbert
AraRAN
Skylark Base Station
000
4
ISICS
AraRAN
Skylark Base Station
000
Launch a container equipped with APIs using the container image
arawirelesshub/aramimo:v1.1Once the container is launched, take a note on the floating IP if you want to access the container from your PC via ARA jumpbox.
The containers can be accessed via the
Consoletab of the respective containers in the Project -> Containers tab.To SSH to the container using floating IP, ssh needs to enabled in the container. In
Console, run the following command# service ssh start
Set the password for root by typing the following command and then set the password
# passwdNow the container can be accessed both from the dashboard Console or using ssh from the jumpbox server.
To ssh to the container, use the floating IP that is reserved for the container with root as username and password that is set in previous step. Visit ARA Jumpbox for more information on accessing containers via jumpbox.
In the container, Run the following command to launch the CLI.
# ara-sklk-cli
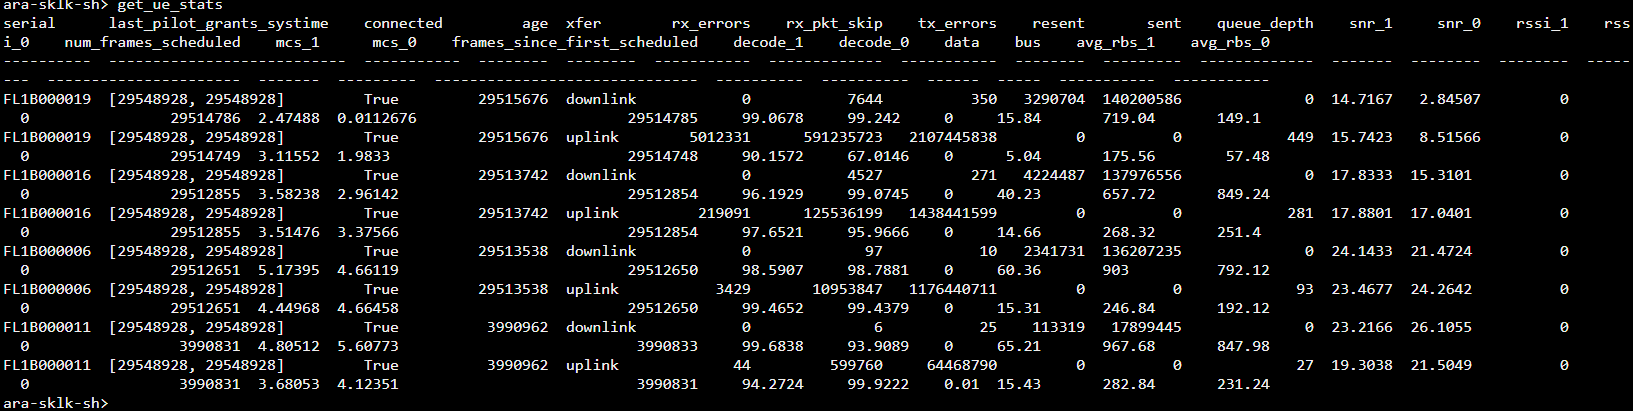
Run the following command to get the number of CPEs connected, SNR, and the average MCS. The information provides an idea about current system performance. In the following screenshot, 4 UEs are connected
> get_ue_stats
For getting the Skylark UE ID and corresponding location, execute the following command.
> get_ue_locations

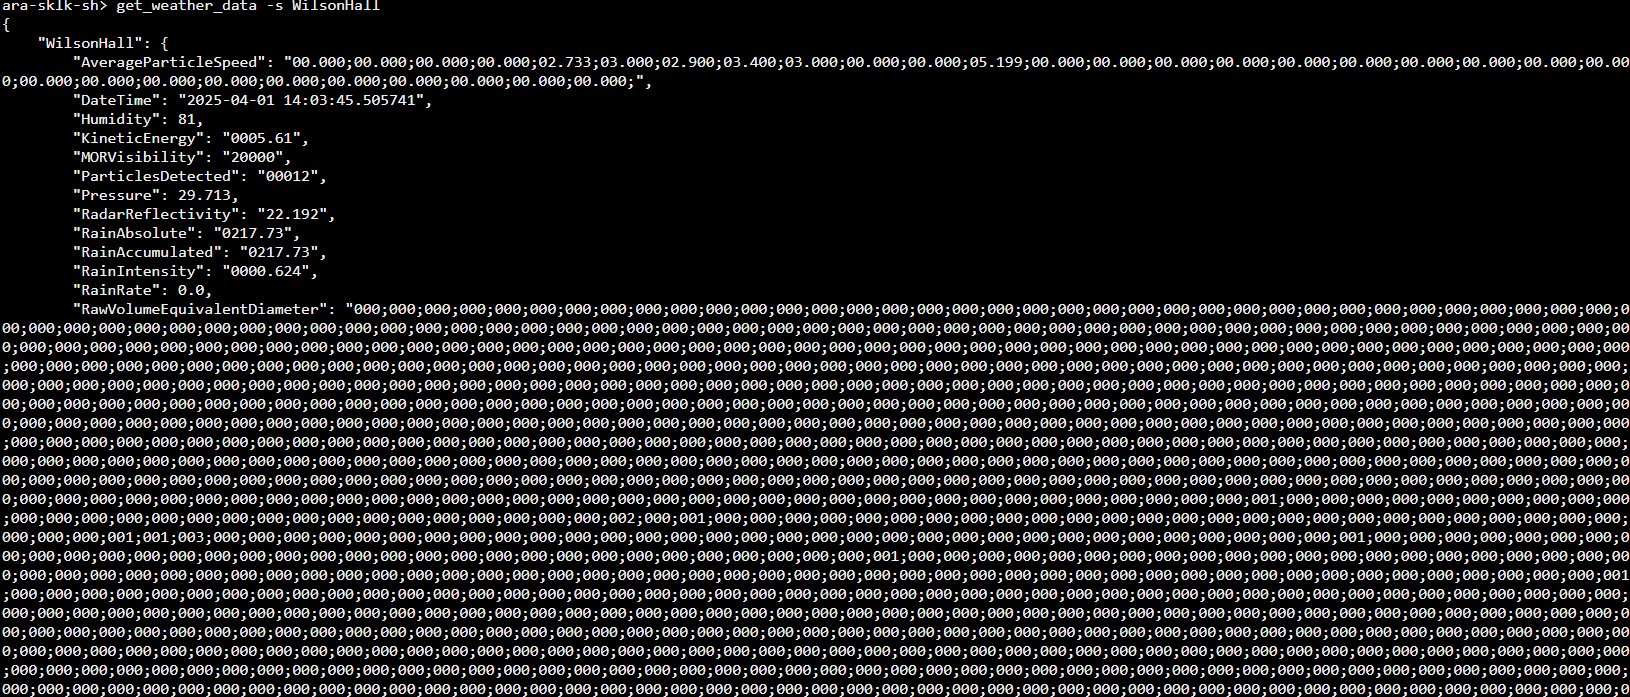
To get weather data, execute the following by speecifying the sitename. Sitename could be WilsonHall, AgronomyFarm (or all for both sites). For example following command will show the weather data for Wilson Hall.
> get_weather_data -s WilsonHall
Type
`help -v`to show all the commands that can be run to extract wireless link data such as SNR, throughput etc. Here are the list of commands that can be run.alias Manage aliases get_center_freq Return Center Frequency on all Radios get_config Return Current BS Configuration get_connected_ues Returns all the connected ues get_csi_data Returns csi data get_grouping_info Returns detailed grouping info at each band get_main_stats Returns detailed statistics of the system get_mcs Print average MCS Index for UE's get_phy_config Print Phy Configuration Parameters get_phy_enabled Check if Phy is Enabled and BS Transmitting get_snr Print Connected UE's SNR get_ue_bus_rates Print Bus Rates in Mbps get_ue_data_rates Print Data Rates in Mbps get_ue_locations Returns the locations of ues get_ue_stats Print Connected UE's Statistics get_weather_data Return Weather Data for Wilson Hall and Agronomy Farm help List available commands or provide detailed help for a specific command history View, run, edit, save, or clear previously entered commands quit Exit this application run_pyscript Run a Python script file inside the console shell Execute a command as if at the OS prompt
This container contains the AraMIMO Repo on Gitlab which contains other useful scripts along with documentation. The AraMIMO API is documented in the user manual.
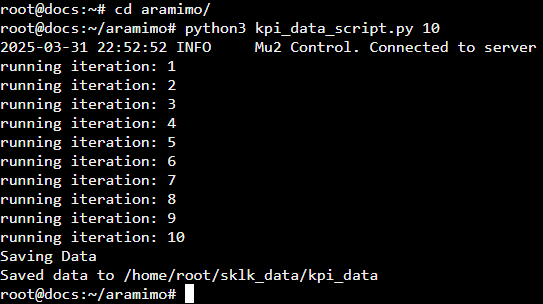
If you need to collect data, there are multiple example scripts in the
aramimorepo. e.g. to capture capacity, SNR, MCS, for each UE, run thekpi_data_scriptby providing the number of iterations. It will collect the data for the number of iterations (seconds) and save as json file. The following will capture the data for 60 seconds. Exit from the CLI and go intoaramimorepo and then run the following command:cd aramimo python3 kpi_data_script.py 60
Note
You must first exit out of the ara-sklk-cli to access and run the scripts in the
aramimorepo.Similarly, the
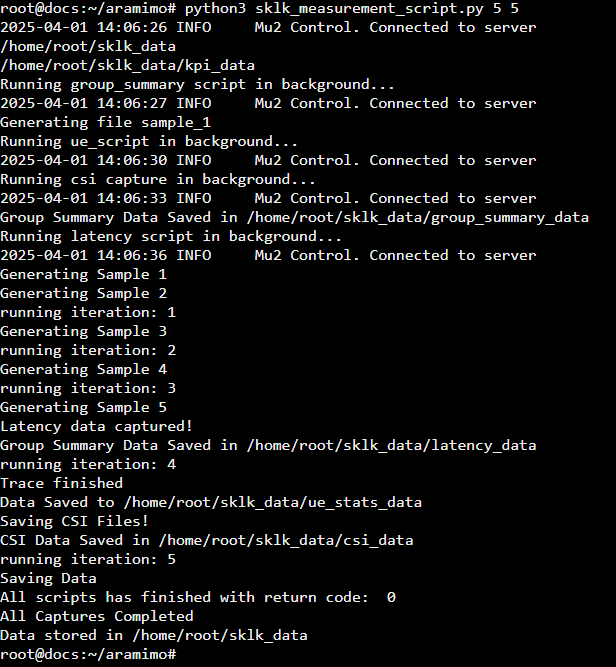
latency_script,group_summary_script,ue_stats_scriptandcsi_capture_scriptwill collect the latency, grouping, UE received power and CSI data respectively. All files take number of iterations to by passed as an argument exceptcsi_capture_scriptwhich requires number of seconds as input. Note that the number of seconds can not be greater than 100. Each file has instructions on how to run the script written in comments at the top of the file.sklk_measurement_scriptis more comprehensive and when run it will run the above scripts in different threads to collect all data at the same time. To run thesklk_measurement_scriptprovide repititions and seconds (for CSI) as arguments.python3 sklk_measurement_script.py 30 10
Tip
If you want to perform weather measurements along with the AraRAN experiments, refer to ARA Weather APIs.